 Kicking the macabre game of flesh up one more freakish mark, you learn as you enter this quest that this is all some game to the Mind Flayer Yaulthoon. He is not a mastermind arch villain; he is simply a struggling artist hoping to make finally make it in the wide multiverse. Yaulthoon seems to work in a disturbing medium, the flesh of mortals! Be wary as you make your way through this grotesque museum of the flesh as the pieces of art themselves seem to want pieces of your flesh for their own!
- Series: Harbinger of Madness
- Level: 15
- Patron: Free Agent
- Length: Long
- Dungeon: Harborview Lofts
- Recommended Party: Standard
- MoBs: Greater Thraak Hound, Taken, Beholder, Xoriat Render
- Dangerous MoBs: Mind Flayer Mage, Young Beholder, Pykzyl, Dead Pykzyl, Yaulthoon
- Buffs: Standard, Death Ward
- Quest Stats: Detailed Quest Stats on DDMs Realm Here
 Before you head in make sure that you have spoken to Tessa Aster and you are on the right step of the Harbinger of Madness quest series so you can get the extra reward when it is done.
It’s time to put an end to all of this and find the illithid behind the disappearances and the Taken and put an end to him.
This quest is one of the few where the breaking breakables in this quest make it so you cannot get breaking bonuses. So unless you want the junk that drops out of them, do not waste your time smashing stuff.
Buff lightly here at the beginning because you will soon run into a beholder that will make short work of your buffs. There are no real challenging mobs here at the beginning so toss out the standard stuff, don’t forget Death Ward, and clear the initial area.
 If you normally have DM voices off, I would definitely suggest that you turn them on for this quest. They did a great job and it adds a ton to the adventure as a whole.
Entering Harborview Lofts
Enter and buff a little bit if you want. Once you open the door be ready for a fight, as there are mobs just inside.
Keep an eye on the displays of art. Some will break out of their display cases and attack you!
The Harborview Loft Courtyard
 Move around the edge and be ready for the Taken to break out of their displays! Make your way around the courtyard clearing all the way around the water. Keep going around and clear out all of the monsters until you get to the big door. At this point stop and do not go through the door.
Put on your underwater action items and move back to the south side of the water by the fence. Behind the bush is a small opening that will give you access to the water. Swim to the east to make your way to the secret treasure room.
Yaulthoon’s Secret Treasure Room
 Swim east and make sure you have underwater action on. Be wary of the traps once you get past the secret door at the end. Have a rogue swim down into the trap on the west side and search for the control box there to disable it.
Swim into the room but don’t jump out yet. Scan the room to see what mobs you have. There is usually a small young beholder in here and a few Taken. A named greater Thaarak hound, The Sculpted Hound, can spawn in here or another location as a rare. If it spawns you will have a bigger chest here with loot.
Once you know what you are fighting, jump in the room and take them out.
You will see a treasure chest behind a glass pane. To the right of that, you will see the combination that must be used for the glass to break. You will find yourself surrounded by six rune wheels. Each will have a different number of orbs on the plaque above them.
 Look to the right of the glass to determine what the combo is. You will need to take note of the symbol, the amount of brightly lit orbs and how many small wheels are on the right.
- Symbol – What the large rune wheels need to be set to.
- Bright Orbs – The total that the run wheels must equal in order for the glass to break.
- Small Rune Wheels – The number of these relates to how many wheels you must use in order to hit the right number.
When setting the large rune wheels make sure that the wheels you are not using are not set to the rune in the combo.
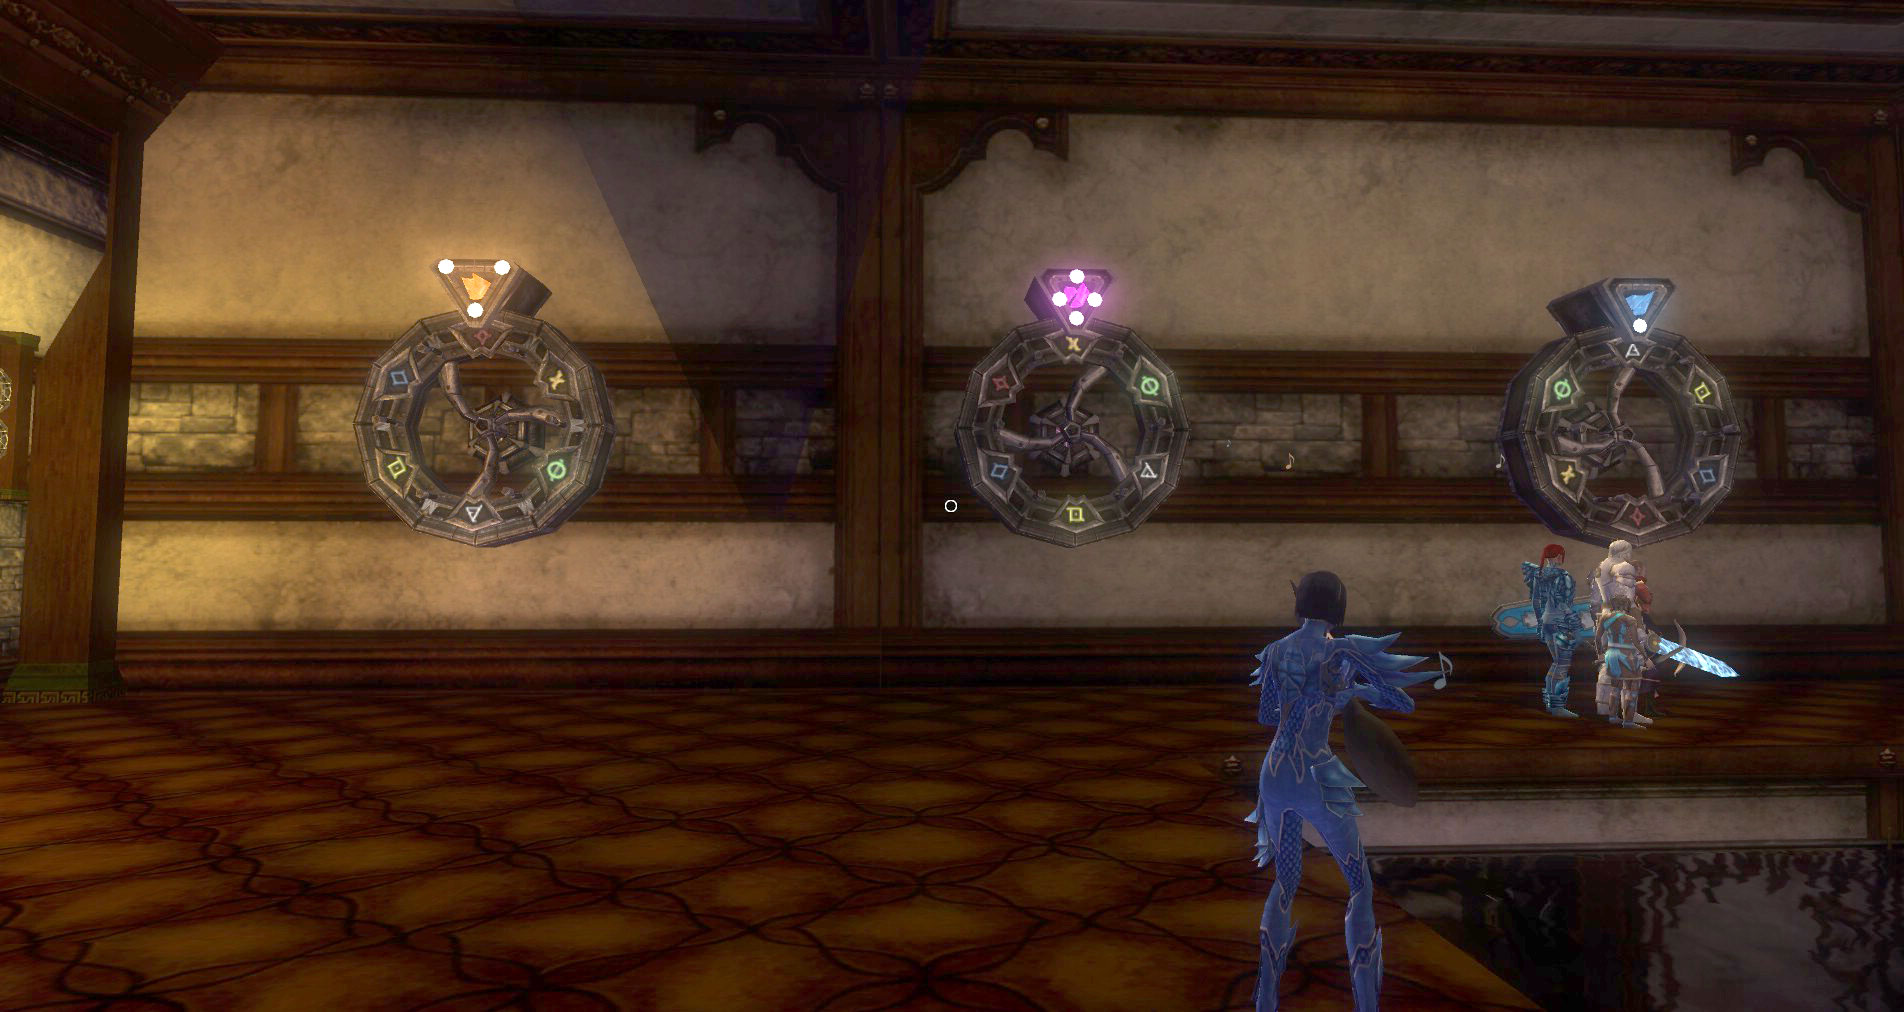
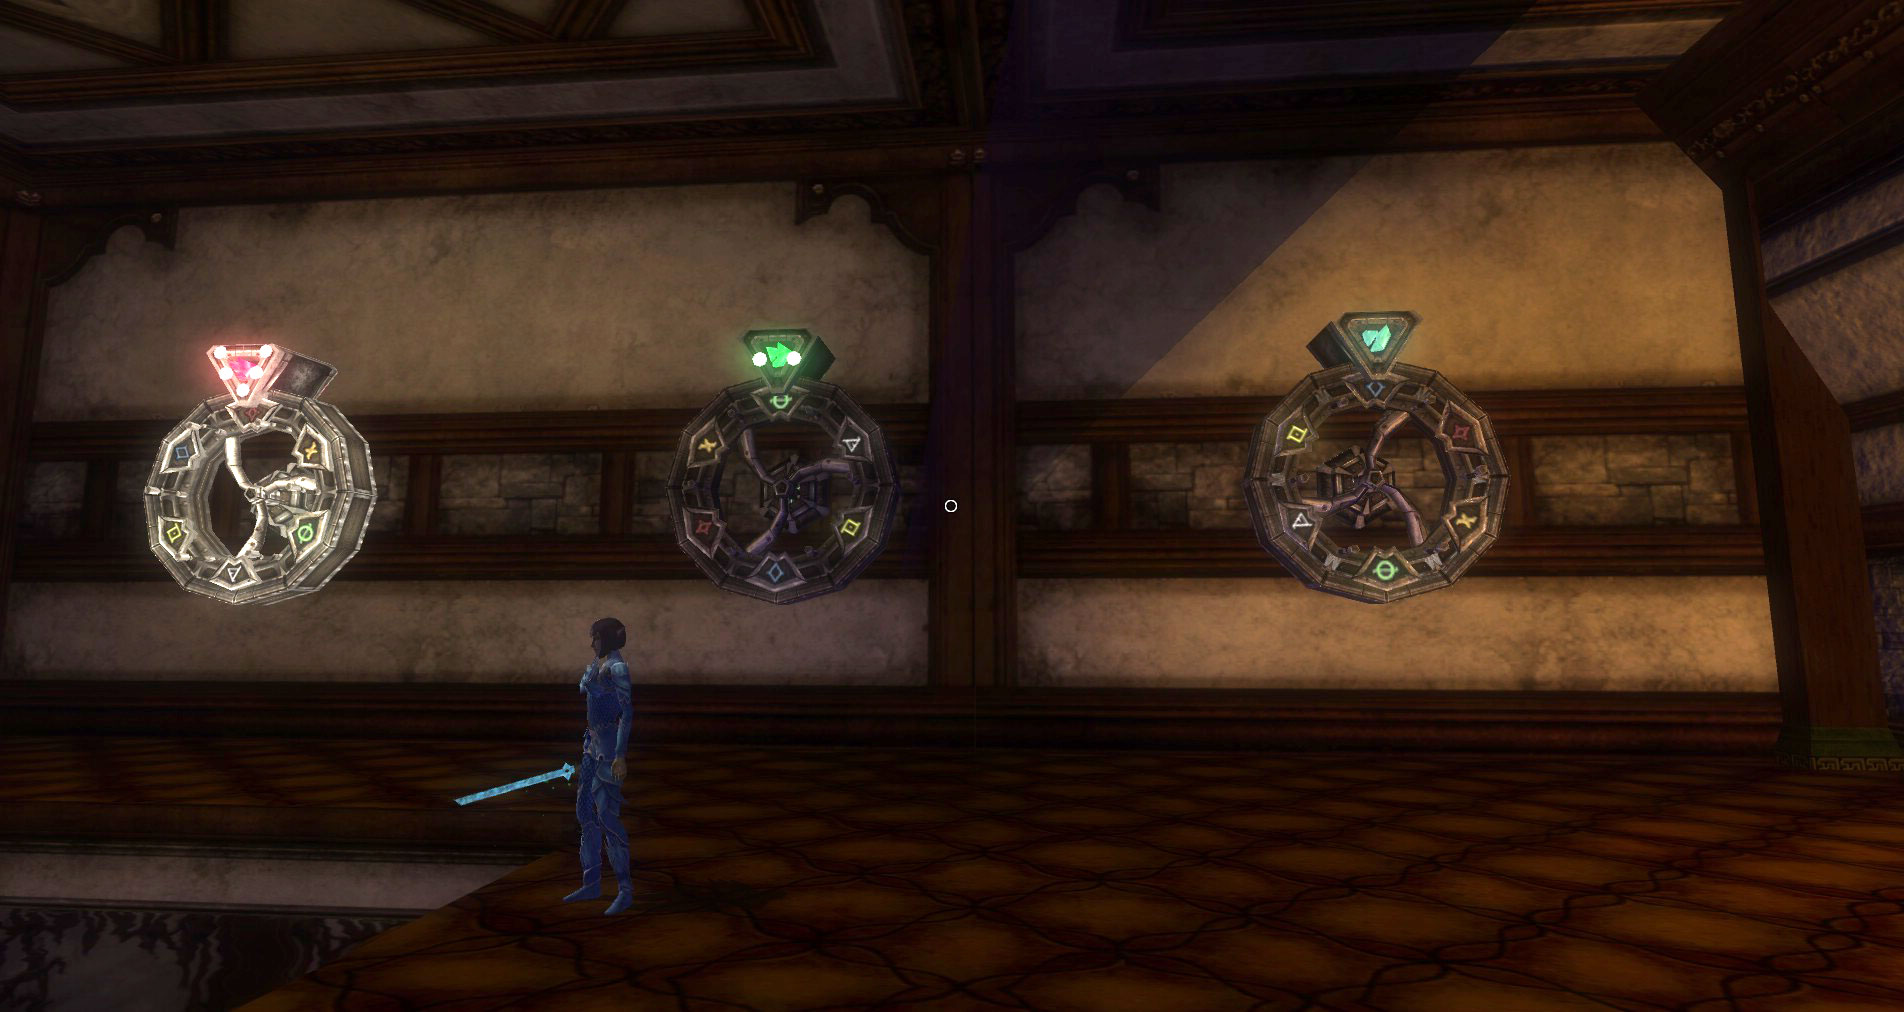
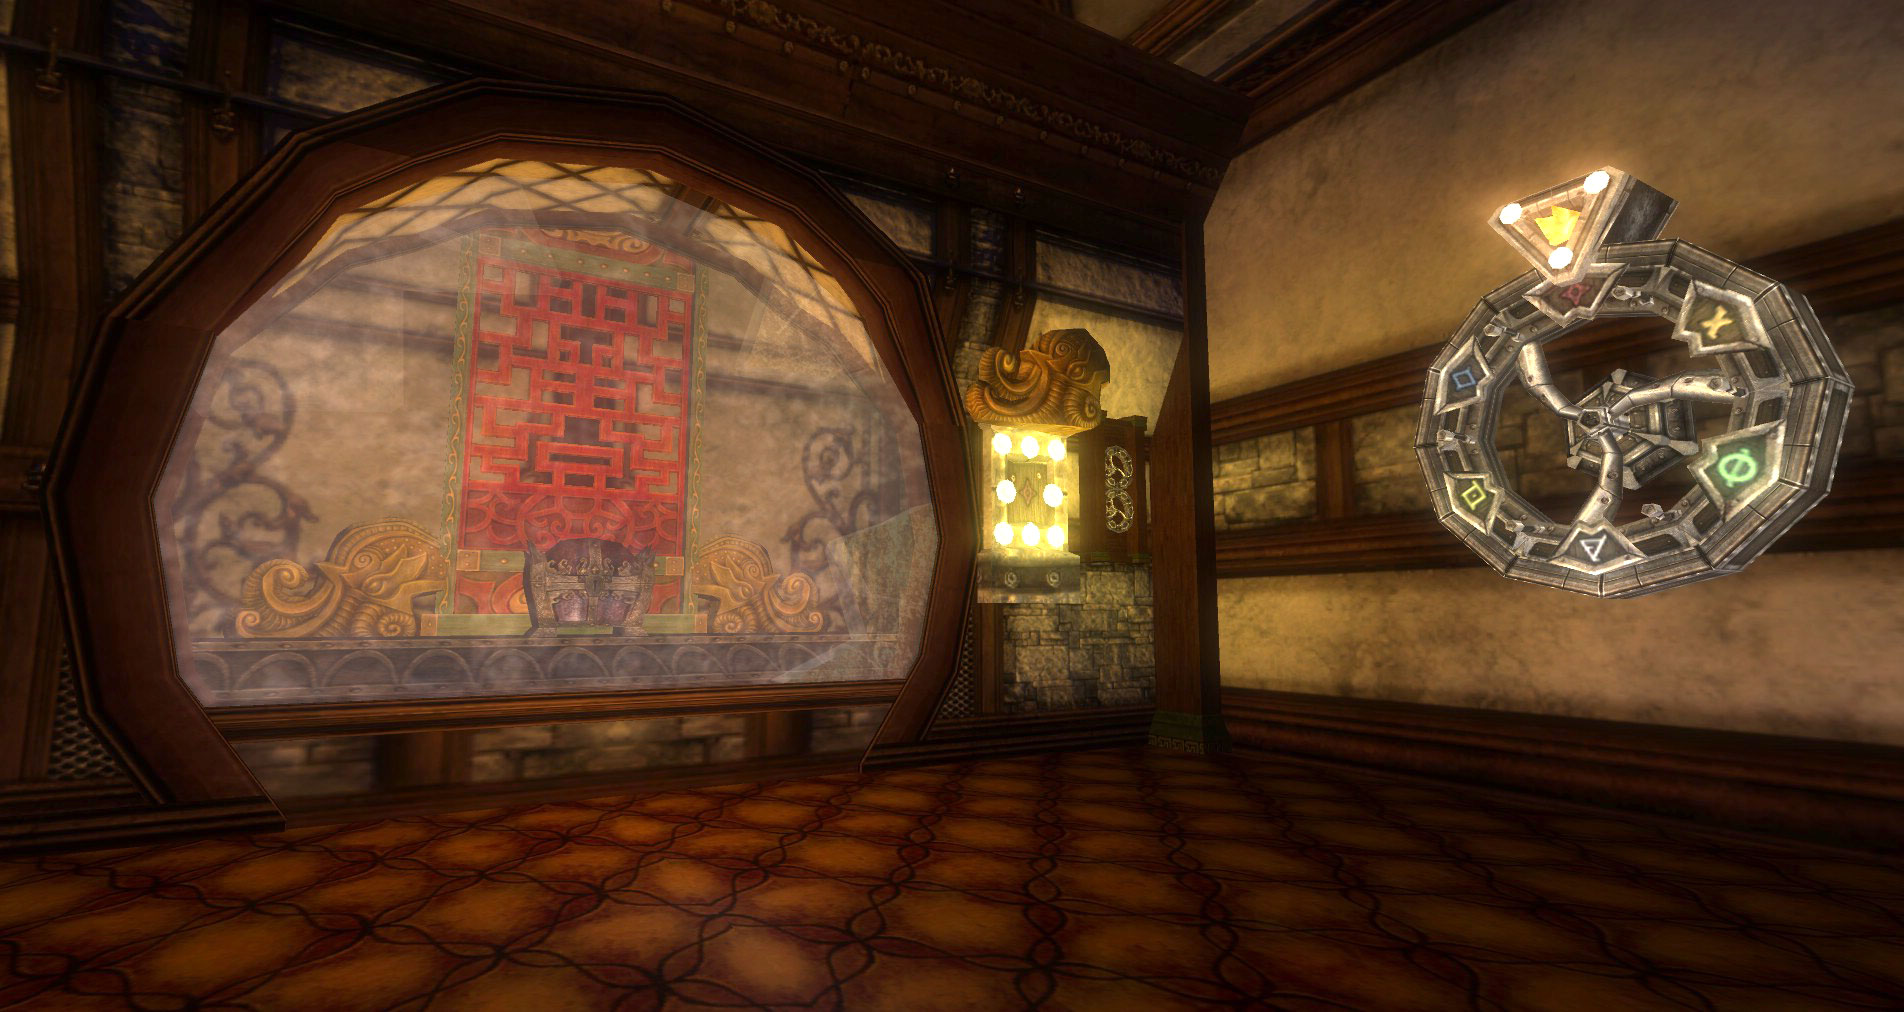
In this combination I need to set the symbols to the red star. I need the rune wheels to equal 8 while using two wheels. Solution: Set the 5 dot wheel and 3 dot wheel to Star and make sure the rest of the rune wheels are off of the red star.
Once the combo is right the glass will shatter and the chest will be available to you. Make sure that you are working together as it is easy to confuse the rune wheels if too many people are messing with them.
Once you have looted this chest head back to the big door where you stopped earlier.
Hall of the Absurd
 Gather the party in front of the door and buff up because a big fight is coming. Once you are buffed, head into the Hall of the Absurd.
You will again hear Yaulthoon’s voice in your head as he speaks with pride about these creations. He soon unleashes them on you, calling it his Artistic Onslaught. Gross. There are 5 waves of 8 Taken each that come ambling out of their display cases. Be sure to allow them to make it all the way out of their display cases because they can get hung up on them.
Keep an eye on the count because as the last Taken dies (there are 40 of them), the door at the top of the ramp will open up and a big mean controller beholder, Pxzyl, will come out and attack as the final assault of this Artistic Onslaught. Finish him off and remove any effects that might be lingering on the party from the fight.
Second Floor in the Hall of the Absurd
 Continue to the second floor. Make sure you loot the chest that Pykzyl leaves behind. To the west is a shrine you can use with a few Taken in it. Clear out this area and head to the second level overlooking the initial courtyard.
Above the Harborview Loft Courtyard
Clear out above the courtyard and head to the south side to retrieve the Crest of the Octopus. You will need this to enter Yaulthoon’s private chambers. Monitor the displays as more Taken will burst forth to stop your progress.
Octopus Crest Room
 There are a handful of mobs in the Octopus Crest room but nothing out of the ordinary, for this quest at least. Make sure you pick up the Crest of the Octopus to unlock the door to Yaulthoon’s Private Quarters.
When in the crest room, make sure to head into the display case to the west. There is a secret door in the back of it that leads to another hidden treasure. Have someone that is good at jumping jump from pillar to pillar over the pit to hit the switch. Make sure to have Jump, Haste and Feather Fall and you should be fine. When you hit the switch it creates a walkway so the rest of the party can get the treasure. Be careful not to fall. The bottom of the pit has roaming doom spheres in it.
 If you are feeling brave you can even use these Doomspheres to buff up by running through them. Just make sure that you have sufficient buffs and do not go down there and die needlessly.
Make sure you are ready for a fight when the doors open on the other side of the pillars. The treasure is protected by a bunch of Taken and a Mind Flayer Mage. They will attack as soon as the door is open. A named greater Thaarak hound, The Sculpted Hound, can spawn in here as well. If it spawns you will have a bigger chest here with loot.
Once you have the crest and the extra chest, head back to the socketed entrance to Yaulthoon’s Private Wing to the east. There will be mobs that spawn on the path back so be ready to fight them off on your way back through.
Yaulthoon’s Private Wing
 Moving deeper into the dungeon, you’ll run into more of Yaulthoon’s creations. A few of his choice pieces are on display here. Clear the way to the shrine but do not use it yet.
Head back to the main display case. There is a large golden plaque in there. When you use it, it reveals another hidden area. Your friend from the Hall of the Absurd is ready for round two. Pykzyl is here but this time he is undead and way nastier then before. Get ready for a tough fight. Should terrible things happen the shrine is now clear and you can take back your dead people to the shrine if needed. He is pretty tough and for some reason got his anti-magic powers back in death. Use the pillars in the room to block line of sight and jump out to cast when you can. Try to stay behind him if possible. He has a lot of HP but can be taken down this way.
 You can retreat out of here if things go poorly and you should be able to reach the shrine you previously cleared. This is an optional so if it is too tough for your party it might be best to skip it. Undead beholders are nasty!
The Showroom
Shrine up, buff up and get ready for one wacky fashion show. Once you click through the door there is no going back so make sure everyone is ready.
As you zone in, the fashion show will start. There are a few Taken with hats that will walk out and make their way up and down the runway. Be ready for a fight. When Yaulthoon speaks again, many Taken will come out of all of the doors and attack you.  Take out the waves of Taken. There are about 40 or so that will spawn.
Once they are all dead, Yaulthoon will confront you, but this is not a fight of the flesh but a fight of the mind. He overwhelms you with his psychic attacks and all goes black as you enter the mind battlefield of Yaulthoon.
Yaulthoon’s Mind Battlefield
Yaulthoon sets the stage on this small platform in the ether. He is huge and is immune to attacks to begin with. Use the pillars to hide from his attacks. He will draw upon his reserves; these are in the form of strange Stored Brain Pod Victum.
 Whoever has agro needs to stand behind these so Yaulthoon’s energy waves hit the Stored Brain Pod Victum instead of you, causing the victums inside to be released. You will also get hit point points back as if Healed and spell points as a Major Mana Pot if you are close enough to one when it is destroyed.
After a few are destroyed you can attack Yaulthoon. If you continue to destroy them you can stun Yaulthoon which allows you to beat him down faster and get through this fight. This is also a good idea if you need the spell points.
Yaulthoon will teleport to a different side of the mind platform every 60 seconds or so, so be ready to move when he does.
 When he reaches 60% health and 20% health he will call in his mental reserves (Stored Brain Pod Victims) and become invulnerable until more are destroyed.
Through this you will also have to deal with waves of Taken that are trying to help Yaulthoon in the battle.
When Yaulthoon reaches 20% he will start using a very large area of effect attack. You should stop this if possible as it can do a lot of damage quickly. When he starts this attack you will see three Fragile Brain Pods spawn in front of him. If these are not taken out he will Mind Thrust everyone for a lot of damage (40+ per tick on normal). Charge up and smash these fast then get back to work smacking Yaulthoon down. Spell Resistance can block this attack and good saves should help as well. However, the best plan is to make sure he never gets the chance to use this attack.
At this point Yaulthoon should not have long to live. Finish him off and fade back out of his mind back into the Showroom for your loot.
Make sure to head out and talk to Tessa Aster for your series reward. Good luck on your named loot! I hope you had as much fun with these quests as I did!

Hey, thanks for this! I was in Yaulthoon’s chamber with just a hireling and I couldn’t figure out what to do and was getting drilled by all of his spells and stuff. It took me a few minutes but I got him taken care of thanks to this!
Glad to know this quest walkthrough helped you out!
I updated it a little with a few other bits of info I have learned over the last few months.